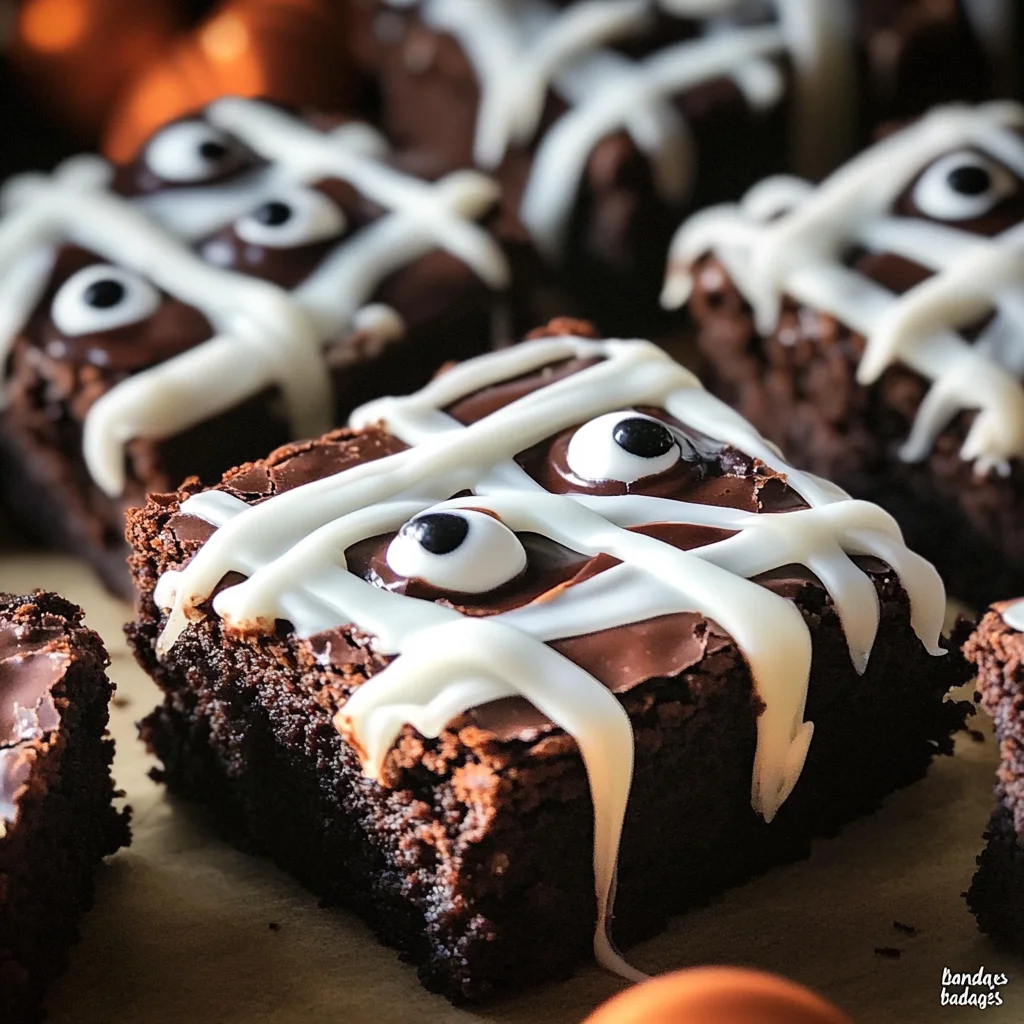
spooky mummy brownies
spooky mummy brownies are the perfect Halloween treat that combines delicious chocolate flavor with a fun and festive design. These adorable brownies are not just tasty; they’re also a fantastic addition to any spooky gathering or Halloween party. With their cute bandaged appearance and candy eyes, they’ll delight kids and adults alike. Plus, they’re easy to make, ensuring you spend more time enjoying the festivities.
Why You’ll Love This Recipe
- Fun Presentation: The spooky mummy design makes these brownies a hit at Halloween parties.
- Rich Chocolate Flavor: Made with dark chocolate, these brownies are decadently rich.
- Kid-Friendly: Simple enough for kids to help make, making it a fun family activity.
- Versatile Treat: Perfect for Halloween, fall gatherings, or just a cozy night in.
- Quick to Prepare: With only 30 minutes of prep time, you can whip these up in no time.
Tools and Preparation
To create your spooky mummy brownies, you’ll need some essential tools to ensure everything goes smoothly.
Essential Tools and Equipment
- 9 x 9 inch cake pan
- Parchment paper
- Microwave-safe bowl
- Stand mixer or hand mixer
- Spatula
- Fork
- Ziptop bag or pastry bag
Importance of Each Tool
- Stand mixer: Makes beating the eggs easy and ensures a fluffy texture for your brownies.
- Parchment paper: Prevents the brownies from sticking to the pan, making cleanup simple.
- Microwave-safe bowl: Ideal for melting chocolate and butter without any hassle.
Ingredients
Ingredients:
– 10 tbsp butter
– 1 1/2 cups dark chocolate chips or chunks
– 1 cup sugar
– 1/4 cup dark brown sugar
– 3 eggs, at room temperature
– 1 tsp espresso powder (optional)
– 2 tsp vanilla extract
– 3/4 cup all purpose flour
– 1/3 cup unsweetened cocoa powder
– 1/2 tsp baking powder
– 1/2 tsp kosher salt
– 1 package candy eyes
– 20 oz semi-sweet or milk chocolate chips
– 1 tbsp coconut oil
– 1 cup powdered sugar
– 2-3 tbsp heavy cream, to thin
How to Make spooky mummy brownies
Step 1: Preheat the Oven
Preheat your oven to 350 degrees Fahrenheit. Line a 9 x 9 inch cake pan with parchment paper so that it hangs over the edges for easy removal later.
Step 2: Melt Butter and Chocolate
In a microwave-safe bowl, heat 1 cup of chocolate chips with 10 tbsp of butter for 1 minute. Stir until the bowl is no longer warm. If needed, microwave another 20 seconds. Stir until very smooth. Whisk in 1 cup of sugar and 1/4 cup of dark brown sugar until dissolved.
Step 3: Beat Eggs
In the bowl of a stand mixer, vigorously beat 3 eggs until very frothy, about 2–3 minutes. With the mixer running, slowly stream in the chocolate mixture and beat until smooth. Add 1 tsp of espresso powder (if using) and 2 tsp of vanilla extract, mixing well.
Step 4: Combine Dry Ingredients
To the chocolate mixture, add:
– 3/4 cup all-purpose flour
– 1/3 cup unsweetened cocoa powder
– 1/2 tsp baking powder
– 1/2 tsp kosher salt
Beat until just combined. Fold in the remaining 1/2 cup of chocolate chips.
Step 5: Bake Brownies
Spread the batter into your prepared baking pan from edge to edge using a spatula. Bake for approximately 25–30 minutes, until an inserted toothpick comes out with just a few moist crumbs. Let cool before cutting into squares.
Step 6: Prepare Chocolate Coating
In a large microwave-safe bowl, pour in 20 oz of semi-sweet or milk chocolate chips along with 1 tbsp coconut oil for coating. Heat for about 1 minute, then stir. If necessary, warm an additional 20 seconds, stirring until smooth. Allow cooling for about 5 minutes while lining a large baking sheet with parchment paper.
Step 7: Coat Brownies
Remove brownies from the freezer. Dip each brownie into the melted chocolate using a fork to coat all sides evenly. Let excess drip back into the bowl before placing them onto the parchment-lined baking sheet. Refrigerate for about 15 minutes.
Step 8: Make Bandage Icing
To create bandages for your mummies, whisk together:
– 1 cup powdered sugar
– Add about 2–3 tbsp heavy cream, starting with one tablespoon and adding more if necessary until you reach a glue-like consistency.
Transfer this icing into a ziptop bag with one corner snipped off or use a pastry bag with a thin tip attached.
Step 9: Decorate Your Mummies
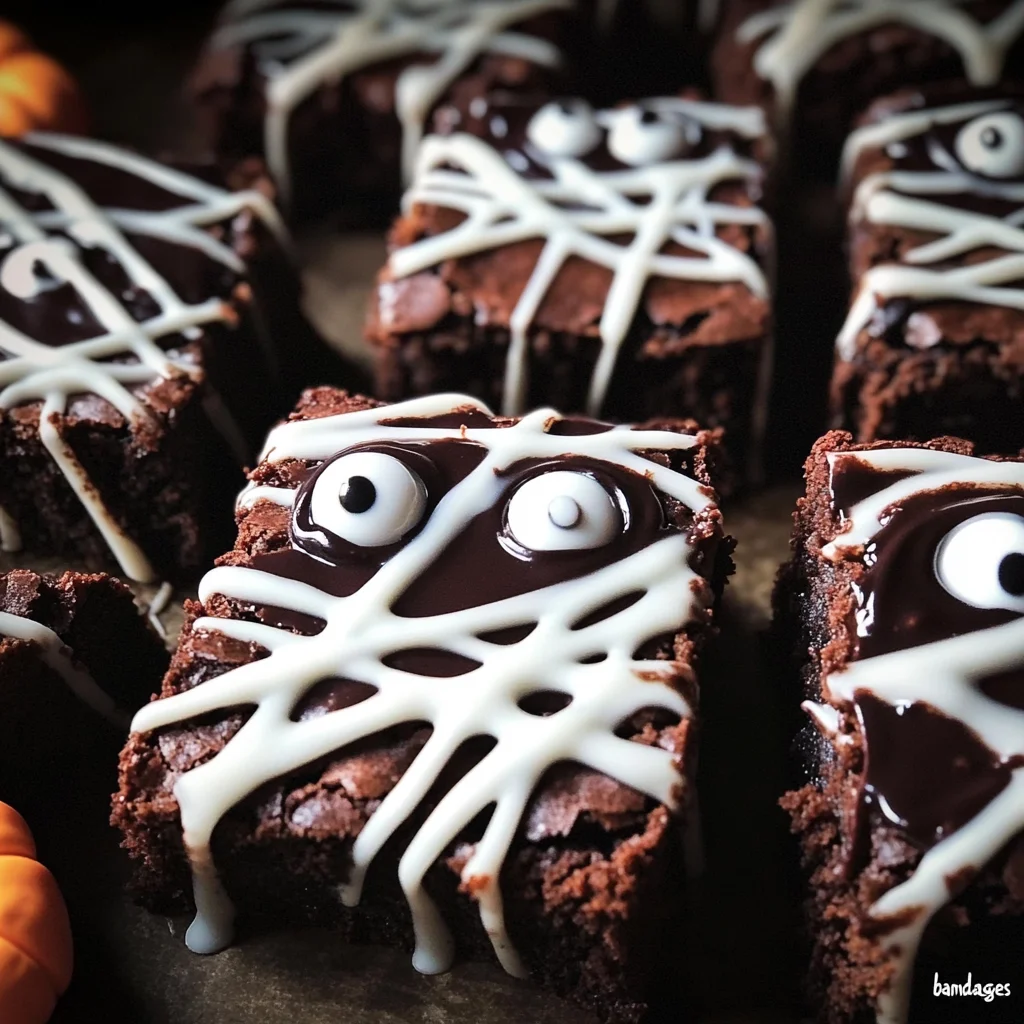
Once cooled, remove brownies from the fridge and draw crisscross patterns on top using your icing to mimic bandages. Attach candy eyes onto the icing before allowing it to harden for about 10 minutes.
Enjoy your delightful spooky mummy brownies!
How to Serve spooky mummy brownies
These spooky mummy brownies are not only a treat for the taste buds but also a delight for the eyes. Perfectly themed for Halloween, they can be served in various fun ways to impress your guests.
Individual Treat Bags
- Create small treat bags filled with spooky mummy brownies. This makes them easy to grab and enjoy at parties or gatherings.
Halloween Dessert Table
- Place the brownies on a dedicated dessert table adorned with Halloween decorations. Add some cobwebs or mini pumpkins for an extra festive touch.
Pair with Ice Cream
- Serve your brownies warm with a scoop of vanilla or pumpkin spice ice cream. The creamy texture perfectly complements the rich chocolate.
Halloween-Themed Platter
- Arrange the brownies on a platter alongside other Halloween treats like ghost-shaped cookies or witch hat cupcakes for a vibrant display.
How to Perfect spooky mummy brownies
Perfecting your spooky mummy brownies requires attention to detail and a few handy tips. Follow these suggestions to elevate your baking game.
-
Use Quality Chocolate: Choosing high-quality chocolate chips enhances the flavor of your brownies, making them richer and more decadent.
-
Don’t Overmix: Mix just until combined after adding the flour mixture. Overmixing can lead to tough brownies instead of fudgy ones.
-
Cool Before Cutting: Allow the brownies to cool completely before cutting them into squares. This helps maintain their shape and makes decorating easier.
-
Customize Your Toppings: Feel free to add sprinkles or colored icing on top of the bandages for extra fun and creativity.
Best Side Dishes for spooky mummy brownies
Serving side dishes alongside your spooky mummy brownies can create a well-rounded dessert experience. Here are some great options that pair wonderfully:
-
Ghostly Meringues: Light and airy meringues shaped like ghosts make a perfect contrast to the dense brownies.
-
Pumpkin Spice Whipped Cream: A dollop of this spiced whipped cream adds flavor and creaminess that pairs beautifully with chocolate.
-
Candy Corn Medley: A colorful mix of candy corn, nuts, and chocolates adds crunch and sweetness to balance the rich flavors of the brownies.
-
Caramel Apple Slices: Fresh apple slices drizzled with caramel bring a refreshing tartness that complements the sweet chocolate perfectly.
-
Spooky Fruit Skewers: Assemble fruit skewers using grapes, bananas, and strawberries for a healthy yet festive option that kids will love.
-
Hot Chocolate Bar: Set up a hot chocolate station with toppings like marshmallows, whipped cream, and peppermint sticks for an interactive dessert experience.
Common Mistakes to Avoid
Making spooky mummy brownies can be fun, but avoiding common mistakes is key to success. Here are some pitfalls to watch out for:
- Boldly skip the parchment paper: Not lining your pan can cause brownies to stick. Always line your baking pan with parchment paper for easy removal.
- Boldly forget the eggs’ temperature: Using cold eggs may lead to uneven mixing. Ensure eggs are at room temperature for a smoother batter.
- Boldly overmix the batter: Overmixing can result in tough brownies. Mix just until ingredients are combined to keep them fudgy and soft.
- Boldly ignore cooling time: Cutting into warm brownies can lead to a messy situation. Allow them to cool completely before slicing for neat edges.
- Boldly rush the chocolate coating: Applying the coating too soon may cause it to slide off. Chill the brownies in the freezer before dipping for better adherence.
Storage & Reheating Instructions
Refrigerator Storage
- Store spooky mummy brownies in an airtight container.
- They will stay fresh for up to 5 days in the fridge.
Freezing spooky mummy brownies
- Wrap each brownie individually in plastic wrap.
- Place them in a freezer-safe bag or container for up to 3 months.
Reheating spooky mummy brownies
- Oven: Preheat to 350°F (175°C) and heat brownies for about 10 minutes until warm.
- Microwave: Heat one brownie at a time for about 15-20 seconds, checking frequently.
- Stovetop: Use a skillet on low heat, covering with a lid, and warm each brownie for about 5 minutes.
Frequently Asked Questions
Here are some common questions about making spooky mummy brownies:
Can I use different types of chocolate?
Yes, you can mix dark and milk chocolate or even use white chocolate for variety!
How do I make these spooky mummy brownies gluten-free?
Substitute all-purpose flour with a gluten-free flour blend. Adjust as necessary based on the blend used.
What can I use instead of candy eyes?
You could use mini marshmallows or chocolate chips if candy eyes aren’t available.
How do I store leftover spooky mummy brownies?
Store them in an airtight container at room temperature or refrigerate for longer freshness.
Final Thoughts
Spooky mummy brownies are not only adorable but also incredibly delicious! Their customizable nature allows you to add unique touches like different toppings or flavorings. Give this recipe a try during Halloween or any festive occasion, and watch everyone enjoy these delightful treats!
Spooky Mummy Brownies

Indulge in the festive spirit with our spooky mummy brownies! These delightful treats are the perfect Halloween dessert, combining rich chocolate flavor with a fun and playful design that will charm guests of all ages. Each brownie is adorned with a white icing bandage pattern and topped with candy eyes, making them not only tasty but also visually appealing. With just 30 minutes of prep time, you can whip up these easy-to-make brownies and spend more time enjoying the Halloween festivities. Whether you’re hosting a party or simply looking for a cozy treat, these spooky mummy brownies are sure to be a hit.
- Prep Time: 30 minutes
- Cook Time: 30 minutes
- Total Time: 1 hour
- Yield: Serves approximately 16 brownies 1x
- Category: Dessert
- Method: Baking
- Cuisine: American
Ingredients
- 10 tbsp butter
- 1 1/2 cups dark chocolate chips
- 1 cup sugar
- 1/4 cup dark brown sugar
- 3 eggs, at room temperature
- 1 tsp espresso powder (optional)
- 2 tsp vanilla extract
- 3/4 cup all-purpose flour
- 1/3 cup unsweetened cocoa powder
- 1/2 tsp baking powder
- 1/2 tsp kosher salt
- 1 package candy eyes
- 20 oz semi-sweet or milk chocolate chips
- 1 tbsp coconut oil
- 1 cup powdered sugar
- 2–3 tbsp heavy cream, to thin
Instructions
- Preheat your oven to 350°F (175°C). Line a 9 x 9 inch cake pan with parchment paper.
- Melt the butter and 1 cup of chocolate chips in a microwave-safe bowl until smooth.
- In a stand mixer, beat the eggs until frothy. Gradually mix in the melted chocolate mixture along with sugar.
- Fold in flour and remaining chocolate chips until just combined.
- Pour into the prepared pan and bake for 25-30 minutes or until a toothpick comes out with moist crumbs.
- Let cool before cutting into squares. Decorate with white icing to create bandages and add candy eyes.
Nutrition
- Serving Size: 1 brownie (45g)
- Calories: 210
- Sugar: 18g
- Sodium: 60mg
- Fat: 12g
- Saturated Fat: 7g
- Unsaturated Fat: 4g
- Trans Fat: 0g
- Carbohydrates: 25g
- Fiber: 2g
- Protein: 3g
- Cholesterol: 40mg