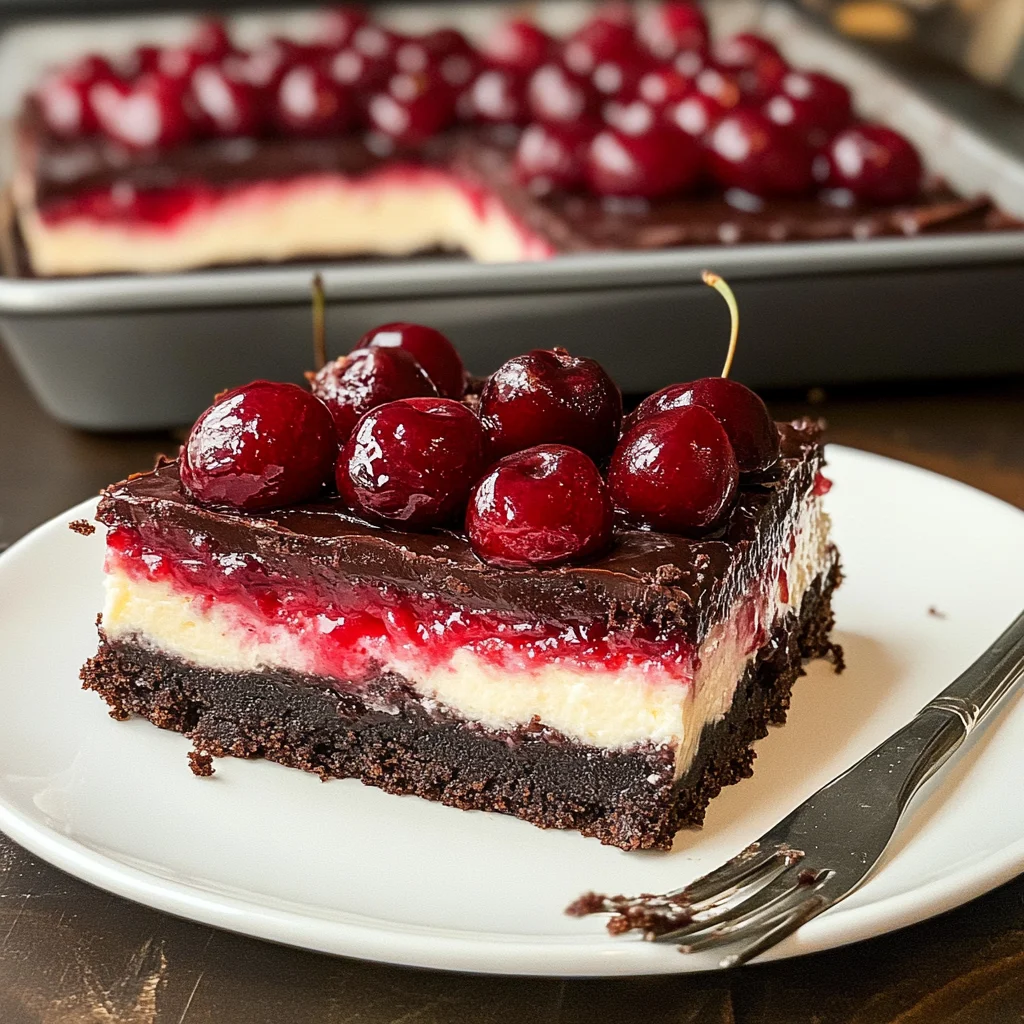
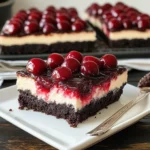
Black Forest Cheesecake Bars
If you love the rich, decadent flavors of chocolate and cherries, these Black Forest Cheesecake Bars are your next must-bake treat. They combine a fudgy chocolate cookie crust, a silky vanilla cheesecake layer, and a topping of sweet cherry pie filling for a dessert that’s both beautiful and incredibly satisfying. Perfect for holidays, potlucks, or a sweet weekend indulgence.
Why You’ll Love This Recipe
- Decadent Flavor – The combination of chocolate and cherries creates a delightful taste experience that’s hard to resist.
- Easy to Make – With straightforward steps, even beginner bakers can create this impressive dessert.
- Versatile Treat – Ideal for various occasions like parties, family gatherings, or just a cozy night in.
- Visually Stunning – The layering and cherry topping make these bars as beautiful as they are delicious.
- Customizable – Add toppings like dark chocolate shavings or whipped cream to suit your taste.
Tools and Preparation
Before you start baking your Black Forest Cheesecake Bars, gather the necessary tools. Having everything ready will make the process smoother and more enjoyable.
Essential Tools and Equipment
- 9×9 inch baking pan
- Mixing bowls
- Electric mixer
- Rubber spatula
- Measuring cups and spoons
Importance of Each Tool
- Electric mixer – Saves time and ensures your cream cheese is perfectly smooth and creamy.
- Rubber spatula – Ideal for scraping down the sides of bowls and folding in ingredients without wasting any batter.

Ingredients
Here’s what you’ll need to whip up your delicious Black Forest Cheesecake Bars:
For the Crust
- 1 ½ cups chocolate cookie crumbs (such as Oreo, without filling)
- ¼ cup unsalted butter, melted
- 2 tbsp granulated sugar
For the Cheesecake Filling
- 16 oz cream cheese, softened
- ½ cup granulated sugar
- 2 large eggs
- 1 tsp vanilla extract
- ¼ cup sour cream (for a creamy texture)
- Pinch of salt
For the Topping
- 1 can (21 oz) cherry pie filling
- Optional: dark chocolate shavings or curls for garnish
- Optional: whipped cream for serving
How to Make Black Forest Cheesecake Bars
Step 1: Preheat the Oven
Preheat your oven to 325°F (160°C). This will ensure that your bars bake evenly.
Step 2: Prepare Your Pan
Line a square baking pan with parchment paper. Leave some overhang on the sides to help lift out the bars later.
Step 3: Make the Crust
- In a mixing bowl, combine the chocolate cookie crumbs with melted butter and granulated sugar.
- Mix until well combined.
- Press this mixture firmly into the bottom of the prepared baking pan to form an even crust layer.
Step 4: Prepare the Cheesecake Filling
- In another mixing bowl, beat together softened cream cheese and sugar until smooth.
- Add eggs one at a time, mixing well after each addition.
- Stir in vanilla extract, sour cream, and salt until fully incorporated.
Step 5: Assemble and Bake
- Pour the cheesecake filling over the crust in the baking pan.
- Bake in the preheated oven for about 30-35 minutes or until set around the edges but slightly jiggly in the center.
- Remove from oven and let it cool completely at room temperature before refrigerating for at least 4 hours.
Step 6: Top with Cherry Filling
Once chilled, spread cherry pie filling evenly over the top of your cheesecake bars.
Step 7: Serve
Cut into squares and serve with optional garnishes like dark chocolate shavings or whipped cream if desired. Enjoy your delightful Black Forest Cheesecake Bars!
How to Serve Black Forest Cheesecake Bars
These Black Forest Cheesecake Bars are versatile and can be enjoyed in several delightful ways. Whether you’re hosting a gathering or treating yourself, here are some serving suggestions to enhance your experience.
Pair with Fresh Berries
- Serve your cheesecake bars with a side of fresh raspberries or strawberries for a burst of flavor and color that complements the chocolate and cherry filling.
Add Whipped Cream
- Top each bar with a dollop of whipped cream to add a rich, creamy texture that balances the flavors perfectly. You can also use dairy-free alternatives if preferred.
Include Dark Chocolate Shavings
- Sprinkle dark chocolate shavings or curls over the cheesecake bars for an elegant touch and an extra chocolatey flavor that enhances the dessert’s appeal.
Drizzle with Chocolate Sauce
- A drizzle of warm chocolate sauce adds decadence to the bars. This is especially delicious when served warm from the oven.
Serve on a Dessert Platter
- Arrange the cheesecake bars on a decorative platter alongside other desserts for an impressive display at parties or potlucks.
Offer Coffee or Tea Pairings
- Complement these bars with a hot cup of coffee or tea. The warmth of the beverages contrasts beautifully with the coolness of the cheesecake, creating a perfect balance.
How to Perfect Black Forest Cheesecake Bars
Perfecting your Black Forest Cheesecake Bars will ensure they are always a hit! Here are some tips to help you achieve cheesecake bliss.
-
Use Room Temperature Ingredients – Ensure your cream cheese and eggs are at room temperature before mixing. This helps create a smooth batter without lumps.
-
Don’t Overmix – Mix the batter just until combined. Overmixing can incorporate too much air, leading to cracks in your cheesecake as it bakes.
-
Use Parchment Paper – Lining your baking pan with parchment paper allows for easy removal once cooled, making it simple to cut neat squares.
-
Cool Gradually – After baking, let your bars cool gradually in the oven by turning off the heat and leaving the door slightly ajar. This helps prevent cracking due to sudden temperature changes.
-
Chill Before Serving – Allow your cheesecake bars to chill in the refrigerator for at least 4 hours before slicing. This helps them set properly and enhances their flavor.
-
Experiment with Toppings – Don’t hesitate to try different toppings like nuts or fruit compotes based on your preference. Each addition can give a unique twist!
Best Side Dishes for Black Forest Cheesecake Bars
Pairing side dishes with Black Forest Cheesecake Bars can enhance your dessert experience. Here are some great options to consider:
-
Fruit Salad – A refreshing mix of seasonal fruits provides a light contrast to the richness of the cheesecake bars.
-
Chocolate Mousse – A small serving of chocolate mousse can elevate your dessert presentation while adding another layer of indulgence.
-
Ice Cream – Vanilla or cherry ice cream serves as an excellent complement, offering a cold and creamy counterbalance to the warm flavors of the bars.
-
Coffee Cake – A slice of coffee cake pairs beautifully, creating a delightful brunch option when served alongside these cheesecake treats.
-
Cheese Platter – An assortment of cheeses can provide savory notes that balance out the sweetness of the dessert, making it ideal for gatherings.
-
Nut Mix – A bowl of spiced nuts offers crunch and salty contrast, perfect for those who enjoy varied textures in their dessert experience.
-
Granola Parfait – Layering granola with yogurt and fruit creates an appealing parfait that can be enjoyed alongside these rich cheesecake bars as a lighter option.
-
Mini Pastries – Serve an assortment of mini pastries for variety; they make for fun finger foods that pair well during any celebration!
Common Mistakes to Avoid
Baking can be tricky, and avoiding common mistakes will help ensure your Black Forest Cheesecake Bars turn out perfectly.
- Skipping the parchment paper: Not lining your pan can lead to a messy cleanup. Always line with parchment for easy removal.
- Overmixing the cheesecake filling: This can introduce air, causing cracks. Mix just until smooth to keep it creamy.
- Using cold ingredients: Cold cream cheese or eggs can lead to lumps. Ensure all ingredients are at room temperature before mixing.
- Not letting it cool properly: Cutting too soon can ruin the texture. Allow the bars to cool completely before slicing.
- Ignoring oven temperature: An incorrect temperature can affect baking time. Always preheat your oven for even cooking.
Storage & Reheating Instructions
Refrigerator Storage
- Store in an airtight container for up to 5 days.
- Place parchment paper between layers if stacking to prevent sticking.
Freezing Black Forest Cheesecake Bars
- Wrap bars tightly in plastic wrap and then place in a freezer-safe container.
- They can be frozen for up to 3 months.
Reheating Black Forest Cheesecake Bars
- Oven: Preheat to 350°F (175°C) and heat for about 10-15 minutes until warmed through.
- Microwave: Heat individual pieces on medium power for about 20-30 seconds.
- Stovetop: Use a non-stick skillet over low heat, covering with a lid for about 5 minutes.
Frequently Asked Questions
Here are some common questions about making Black Forest Cheesecake Bars.
Can I use other fruit instead of cherries?
Yes! Feel free to substitute with other fruit pie fillings like blueberries or raspberries for a different flavor profile.
How do I make these bars gluten-free?
Use gluten-free chocolate cookie crumbs in place of regular ones, ensuring all other ingredients are also gluten-free.
Can I make Black Forest Cheesecake Bars ahead of time?
Absolutely! They store well and can be made up to 3 days in advance. Just keep them refrigerated until serving.
What is the best way to cut these bars?
For clean cuts, use a sharp knife dipped in hot water. Wipe the knife after each cut for neat slices.
How should I serve Black Forest Cheesecake Bars?
They’re great on their own but consider adding whipped cream or dark chocolate shavings on top for extra flair.
Final Thoughts
These Black Forest Cheesecake Bars are a delightful treat that balances rich chocolate with sweet cherries. They’re perfect for any occasion and offer plenty of customization options—try different toppings or crusts based on your preference. Give this recipe a try; you won’t be disappointed!
Black Forest Cheesecake Bars
Indulge in the delightful harmony of flavors with these Black Forest Cheesecake Bars, a decadent dessert that combines a rich chocolate cookie crust, a silky cheesecake filling, and a luscious cherry topping. Perfect for any celebration or as a weekend treat, these bars are not only visually stunning but also incredibly satisfying. With easy-to-follow steps and customizable options, even novice bakers can impress their guests with this showstopper.
- Prep Time: 20 minutes
- Cook Time: 35 minutes
- Total Time: 55 minutes
- Yield: Approximately 12 servings 1x
- Category: Dessert
- Method: Baking
- Cuisine: American
Ingredients
- 1 ½ cups chocolate cookie crumbs
- ¼ cup unsalted butter, melted
- 16 oz cream cheese, softened
- ½ cup granulated sugar
- 2 large eggs
- 1 tsp vanilla extract
- ¼ cup sour cream
- 1 can (21 oz) cherry pie filling
Instructions
- Preheat your oven to 325°F (160°C).
- Line a 9×9 inch baking pan with parchment paper.
- In a bowl, mix chocolate cookie crumbs, melted butter, and sugar until combined. Press into the bottom of the prepared pan.
- In another bowl, beat cream cheese and sugar until smooth. Add eggs one at a time, mixing well; then stir in vanilla extract, sour cream, and salt.
- Pour the cheesecake mixture over the crust and bake for 30-35 minutes until set around the edges.
- Allow to cool completely before refrigerating for at least 4 hours. Top with cherry pie filling before serving.
Nutrition
- Serving Size: 1 bar (approximately 85g)
- Calories: 270
- Sugar: 20g
- Sodium: 180mg
- Fat: 18g
- Saturated Fat: 10g
- Unsaturated Fat: 6g
- Trans Fat: 0g
- Carbohydrates: 23g
- Fiber: 1g
- Protein: 4g
- Cholesterol: 70mg