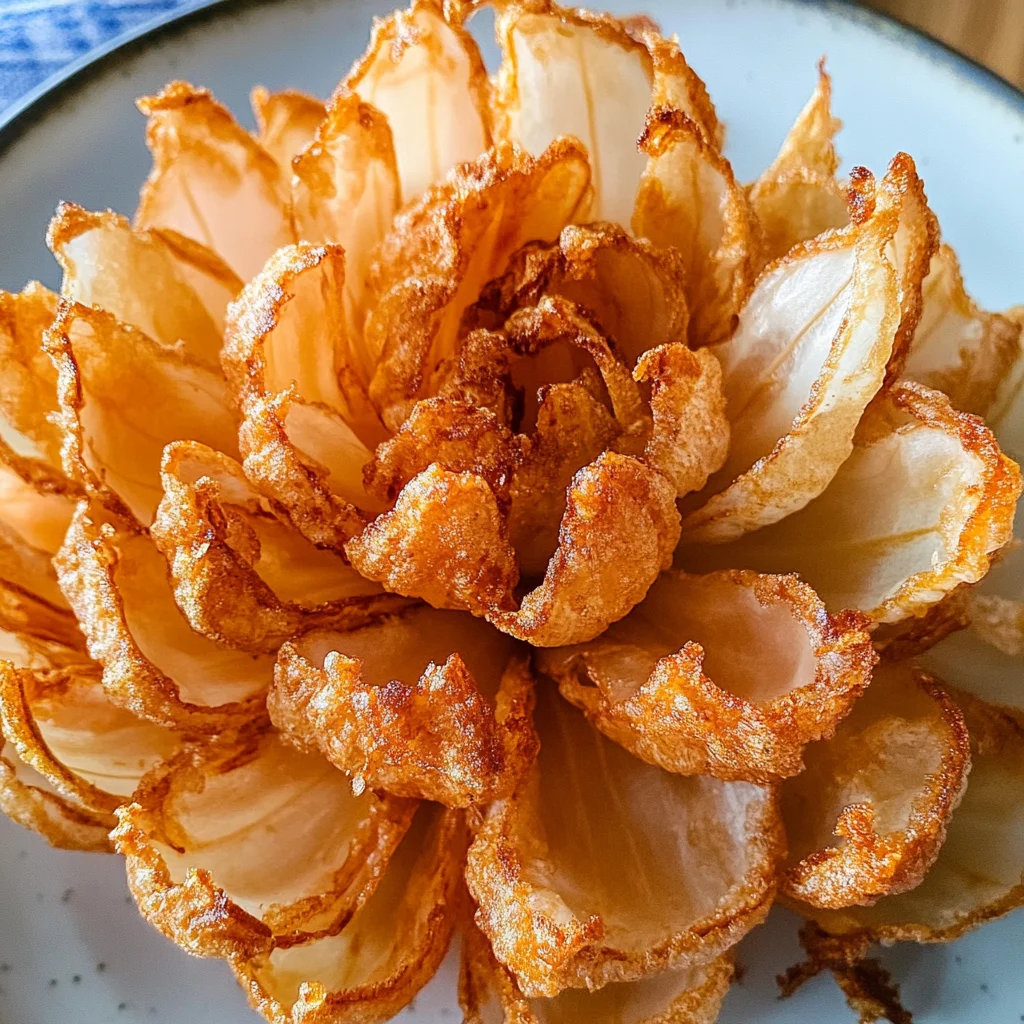
Air Fryer Blooming Onion
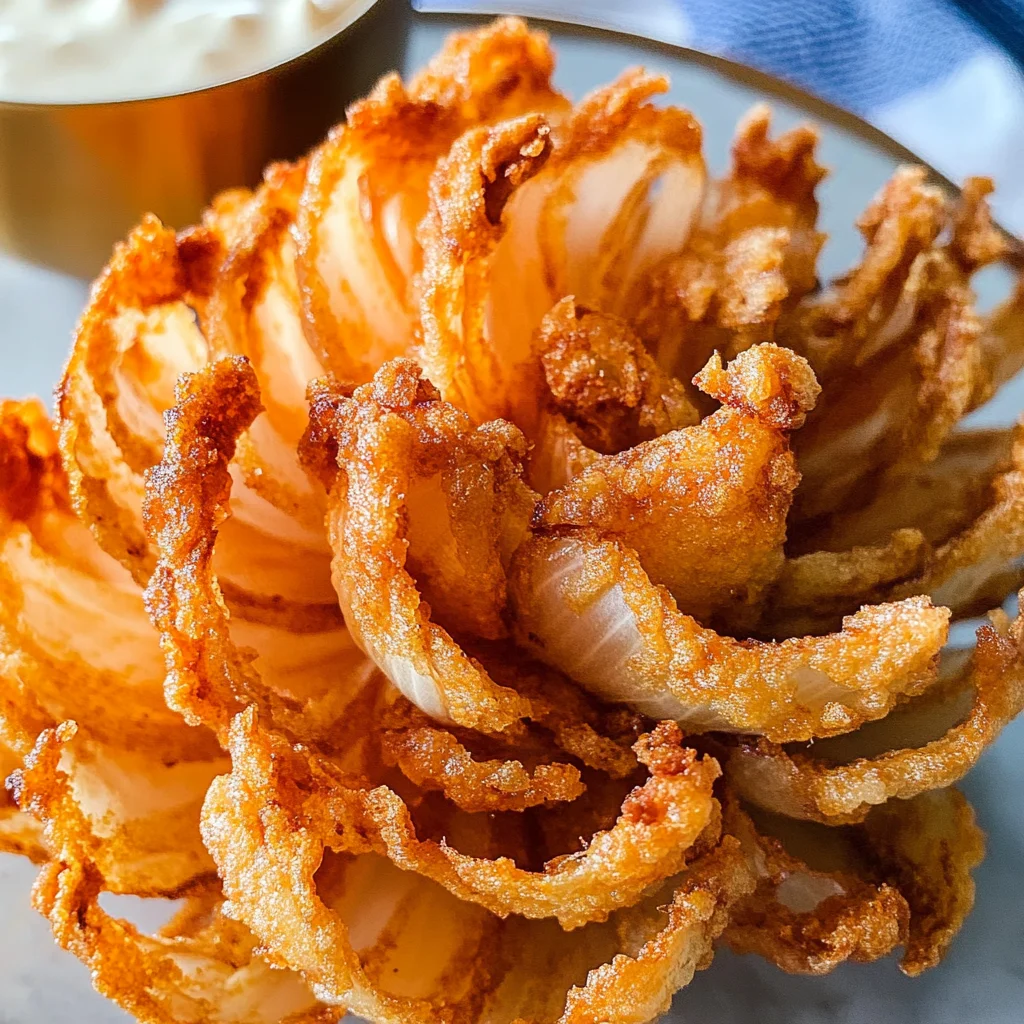
Learn how to make an Air Fryer Blooming Onion, a delicious and crispy appetizer that will impress your guests at any gathering. Whether you’re hosting game day, a family dinner, or simply craving something indulgent, this recipe is perfect for any occasion. With its irresistible flavor and stunning presentation, the blooming onion is a standout dish that’s easier to make than you think!
Why You’ll Love This Recipe
- Easy to Make: You don’t need professional cooking skills to create this impressive appetizer at home.
- Healthier Option: Cooking in an air fryer reduces the oil needed, making it a lighter version of the traditional fried blooming onion.
- Perfect for Sharing: This appetizer is large enough to share with friends and family, making it great for gatherings.
- Customizable Flavor: Adjust the spices according to your taste preferences, adding more heat or different herbs as desired.
- Fun Presentation: The blooming onion not only tastes great but also adds a fun visual element to your table.
Tools and Preparation
To achieve the best results with your Air Fryer Blooming Onion, having the right tools is essential. Here’s what you’ll need:
Essential Tools and Equipment
- Air fryer
- Sharp knife
- Cutting board
- Mixing bowls
- Whisk
- Aluminum foil
Importance of Each Tool
- Air fryer: This tool cooks the onion evenly while providing that crispy texture without deep frying.
- Sharp knife: A sharp knife ensures clean cuts when preparing the onion, helping it bloom beautifully.
- Mixing bowls: These are essential for combining ingredients and coating the onion effectively.
Ingredients
Learn how to make this restaurant quality appetizer at home for a fun game day snack that your family and friends will love!
Ingredients:
– 1 large sweet onion
– 2 ½ cups all-purpose flour
– 1 tablespoon paprika
– 1 teaspoon cayenne pepper
– ½ teaspoon ground cumin
– ½ teaspoon dried thyme
– ½ teaspoon dried oregano
– 2 large eggs
– 1 cup milk
– 1 cup water
– Salt and pepper to taste
– Oil in a spray bottle
How to Make Air Fryer Blooming Onion
Step 1: Prepare the Onion
Start by slicing the onion to make it bloom. Cut off 1/2 inch from the top of the onion and then peel away the outer skin.
Step 2: Create Cuts in the Onion
Place the onion cut-side down. Starting about 1/2 inch from the root, make a downward cut all the way through. Repeat this step to create four evenly spaced cuts around the onion. Then make three additional cuts between each section until you have 16 evenly spaced cuts.
Step 3: Relax the Petals
Turn the onion over and let it sit for about 5 minutes. This allows the petals to relax for better seasoning later.
Step 4: Separate Petals
Before breading, gently separate the outer pieces of the onion using your fingers.
Step 5: Prepare Breading Mixtures
In a large bowl, whisk together flour, paprika, cayenne pepper, cumin, thyme, oregano, salt, and pepper. In another medium bowl, whisk eggs with milk and water.
Step 6: Coat the Onion
Place the onion in a clean bowl cut-side up. Pour half of the flour mixture on top and use a large spoon to coat it thoroughly, especially between petals. Turn it over and pat off excess flour before reserving some flour in the bowl.
Step 7: Dip in Egg Mixture
Put the coated onion into the egg mixture ensuring it’s evenly coated. Let excess drip off before moving on.
Step 8: Final Flour Coating
Transfer back into reserved flour mixture for another coat. Tap off any extra flour gently.
Step 9: Chill Before Cooking
Place your prepared onion in the refrigerator for about 10 minutes while preheating your air fryer.
Step 10: Preheat Air Fryer
Preheat your air fryer at 350ºF for about 10 minutes.
Step 11: Oil Your Onion
Take out your chilled onion and spray generously with vegetable oil from a spray bottle.
Step 12: Transfer Onion into Air Fryer
Create a sling from aluminum foil and carefully transfer your coated onion cut side up into your air fryer basket.
Step 13: Cook
Set your timer for 25 minutes. During cooking, spray oil onto any visible flour spots on your blooming onion two or three times.
Step 14: Season & Serve
After cooking time is complete, remove your blooming onion using aluminum foil sling. Season with salt and pepper before serving with dipping sauce of choice.
Enjoy your homemade Air Fryer Blooming Onion!
How to Serve Air Fryer Blooming Onion
Serving your Air Fryer Blooming Onion is a delightful experience. This crispy, flavorful appetizer can be complemented with various dips and sides, making it perfect for gatherings or casual snacking.
Dipping Sauces
- Creamy Ranch Dip: A classic choice that adds a cool, creamy flavor to the crispy onion.
- Spicy Mayo: Combine mayonnaise with sriracha for a zesty kick that pairs well with the onion’s crunch.
- Honey Mustard Sauce: Sweet and tangy, this sauce balances the savory taste of the blooming onion.
Garnishes
- Chopped Fresh Herbs: Sprinkling fresh parsley or chives adds a pop of color and freshness.
- Lemon Wedges: A squeeze of lemon juice brightens up the flavors and adds a refreshing touch.
Side Snacks
- Vegetable Platter: Serve with crunchy veggies like carrots and celery for an extra healthy option.
- Potato Wedges: Crispy potato wedges make a perfect pairing and complement the flavors of the onion.
How to Perfect Air Fryer Blooming Onion
To achieve restaurant-quality results with your Air Fryer Blooming Onion, follow these essential tips.
- Choose the Right Onion: A large sweet onion works best for a perfect bloom and flavor.
- Cut Carefully: Make sure to slice evenly so that all petals cook uniformly, ensuring even crispness.
- Don’t Rush the Coating: Ensure each layer of flour and egg is adequately applied for maximum crunch.
- Preheat Your Air Fryer: This helps create an ideal cooking environment right from the start, which leads to better texture.
- Monitor Cooking Time: Keep an eye on your onion during cooking; adjust time if necessary for desired crispiness.
Best Side Dishes for Air Fryer Blooming Onion
Pairing side dishes with your Air Fryer Blooming Onion enhances your meal experience. Here are some great options:
- Coleslaw: A creamy or vinegar-based slaw provides a refreshing contrast to the fried onion.
- Garlic Bread: Crunchy garlic bread makes for an excellent companion, offering additional flavors.
- Buffalo Cauliflower Bites: Spicy and crunchy, these bites add a delicious twist to your appetizer spread.
- Stuffed Mushrooms: Savory stuffed mushrooms are another crowd-pleaser that pairs well with blooming onions.
- Macaroni Salad: Creamy pasta salad brings a comforting element to your meal.
- Corn on the Cob: Sweet corn offers a seasonal touch that complements the onion beautifully.
Common Mistakes to Avoid
Making an Air Fryer Blooming Onion can be fun, but there are a few common mistakes to watch out for.
-
Skipping the onion blooming process: Not cutting the onion properly will prevent it from blooming. Make sure to follow the slicing instructions carefully for a beautiful presentation.
-
Overloading with flour: Adding too much flour can result in a heavy texture. Ensure you gently tap off excess flour after coating the onion to achieve a light, crispy exterior.
-
Not preheating the air fryer: Failing to preheat the air fryer can lead to uneven cooking. Preheat your air fryer for at least 10 minutes before placing in the onion to ensure optimal results.
-
Using insufficient oil spray: A lack of oil can cause dry spots on your onion. Spray generously with oil during cooking for a golden-brown finish and crispy texture.
-
Ignoring the resting time: Not letting the onion rest before frying can make it harder for the petals to separate. Allowing it to rest helps create that iconic bloom effect.
-
Serving without dipping sauce: A blooming onion is best enjoyed with a dip. Don’t forget to prepare a delicious blooming onion dip for an enhanced experience.

Storage & Reheating Instructions
Refrigerator Storage
- Store any leftovers in an airtight container.
- Consume within 2-3 days for the best flavor and texture.
Freezing Air Fryer Blooming Onion
- Wrap tightly in plastic wrap and then place in a freezer-safe bag.
- Can be frozen for up to 2 months; however, quality may diminish over time.
Reheating Air Fryer Blooming Onion
- Oven: Preheat to 350°F (175°C) and reheat for about 10-15 minutes until warm.
- Microwave: Heat in short intervals at medium power, checking frequently; this may not retain crispiness.
- Stovetop: Place on a skillet over low heat until warmed through, turning regularly for even heating.
Frequently Asked Questions
Here are some common questions about making an Air Fryer Blooming Onion.
How do I cut an Air Fryer Blooming Onion?
To cut an Air Fryer Blooming Onion, slice off about 1/2 inch from the top, peel it, and make vertical cuts downwards into sections to create petals.
Can I use different types of onions?
Yes! While sweet onions are preferred for their flavor, you can experiment with other varieties like red or yellow onions for a different taste profile.
What is the ideal dipping sauce for an Air Fryer Blooming Onion?
The classic choice is a spicy dipping sauce made from mayonnaise and horseradish. You can also try ranch or blue cheese dressing as alternatives.
How does the air fryer affect cooking time?
The air fryer cooks food faster than traditional methods due to circulating hot air. Always check your food periodically while cooking to avoid overcooking.
Can I make this recipe gluten-free?
Absolutely! Substitute all-purpose flour with a gluten-free flour blend to create a gluten-free version of this delicious appetizer.
Final Thoughts
Making an Air Fryer Blooming Onion is not only easy but also incredibly rewarding. This appetizer brings a touch of restaurant-quality flair right into your home and is perfect for gatherings or game day snacks. Feel free to customize your seasonings or dipping sauces according to your taste preferences!
Air Fryer Blooming Onion

Air Fryer Blooming Onion is a delightful and crispy appetizer that elevates any gathering. This restaurant-quality dish is not only visually stunning but also easier to prepare than you might think. With its irresistible flavor and a healthier twist, thanks to the air fryer, this blooming onion is a perfect choice for game day, family dinners, or casual snacking. Customize the spices to suit your taste and impress your guests with this fun and flavorful treat!
- Prep Time: 20 minutes
- Cook Time: 25 minutes
- Total Time: 45 minutes
- Yield: Serves approximately 8 people 1x
- Category: Appetizer
- Method: Frying
- Cuisine: American
Ingredients
- 1 large sweet onion
- 2 ½ cups all-purpose flour
- 1 tablespoon paprika
- 1 teaspoon cayenne pepper
- ½ teaspoon ground cumin
- ½ teaspoon dried thyme
- ½ teaspoon dried oregano
- 2 large eggs
- 1 cup milk
- 1 cup water
- Salt and pepper to taste
- Oil in a spray bottle
Instructions
- Prepare the onion by slicing off the top and removing the outer skin.
- Make vertical cuts into the onion to create petal-like sections.
- Allow the petals to relax for about 5 minutes before separating them gently.
- In one bowl, whisk together flour and spices; in another bowl, combine eggs, milk, and water.
- Coat the onion in flour mixture, then dip in egg mixture, followed by another layer of flour.
- Chill the prepared onion for 10 minutes while preheating the air fryer at 350°F.
- Spray the onion with oil and transfer it to the air fryer basket.
- Cook for 25 minutes, spraying oil onto visible flour spots occasionally.
- Once done, season with salt and serve with your favorite dipping sauce.
Nutrition
- Serving Size: 1/8 of the blooming onion (approximately 50g)
- Calories: 150
- Sugar: 0g
- Sodium: 250mg
- Fat: 3g
- Saturated Fat: 0g
- Unsaturated Fat: 2g
- Trans Fat: 0g
- Carbohydrates: 28g
- Fiber: 2g
- Protein: 4g
- Cholesterol: 30mg