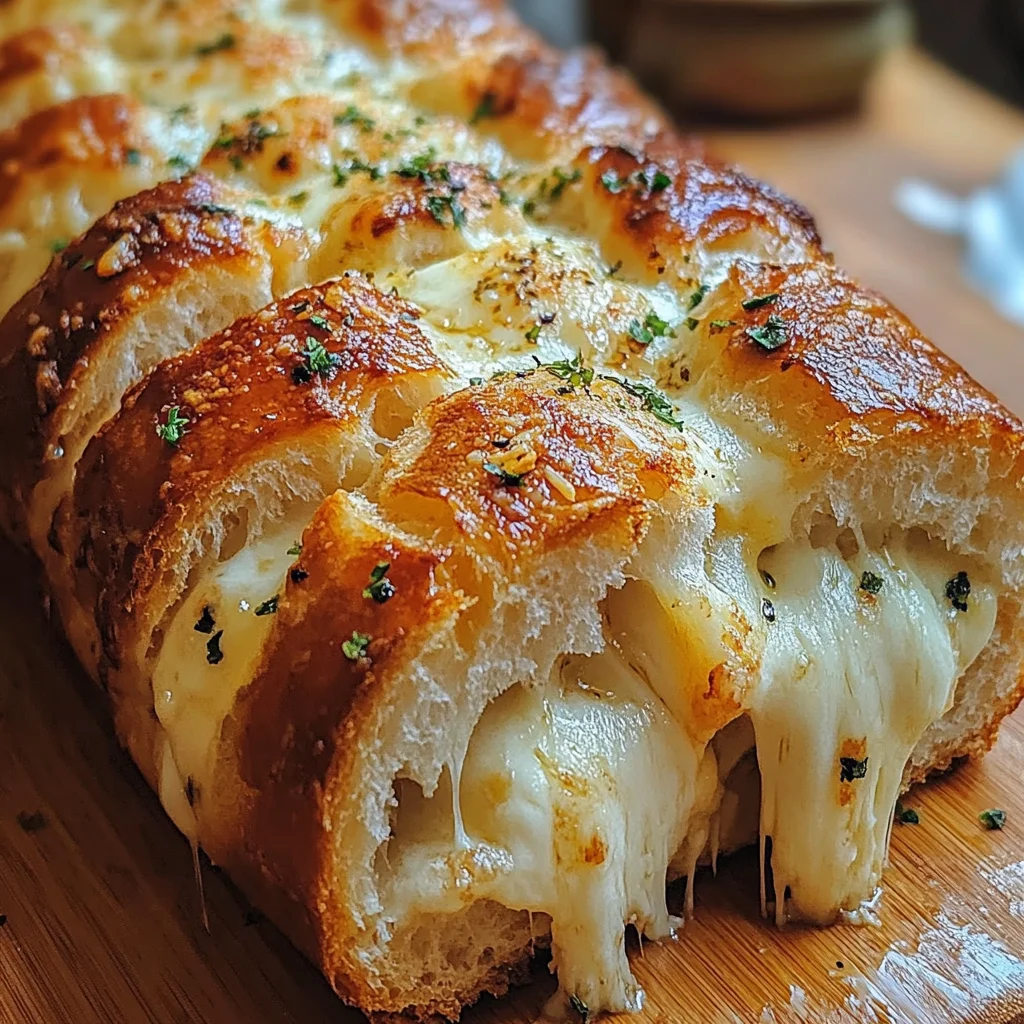
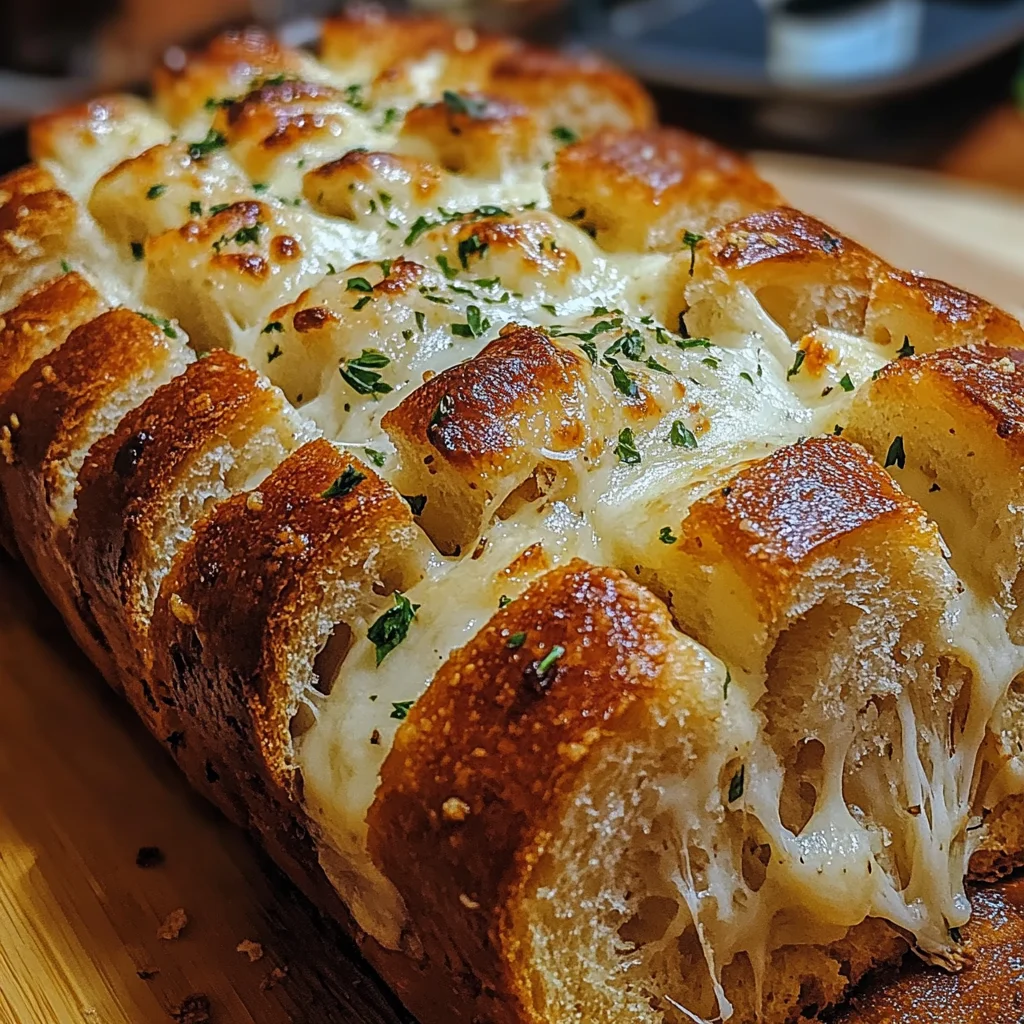
Garlic Parmesan Pull-Apart Bread
Discover the mouthwatering Garlic Parmesan Pull-Apart Bread, a delightful appetizer perfect for gatherings or cozy nights in. This recipe features a crusty artisan loaf filled with savory garlic and a blend of gooey mozzarella and Parmesan cheese. The crispy outer layer gives way to a warm, soft interior bursting with flavor. Easy to make, this crowd-pleaser invites everyone to pull apart and enjoy, making it an irresistible treat for any occasion. Get ready to impress your family and friends!
Why You’ll Love This Recipe
- Easy to Make: With simple steps and minimal prep time, even beginner cooks can create this delicious bread.
- Flavor Explosion: The combination of garlic and Parmesan provides a rich, savory flavor that everyone will love.
- Perfect for Any Occasion: Whether it’s a party, game night, or family dinner, this bread fits right in.
- Customizable: Add your favorite herbs or spices to make it uniquely yours.
- Great for Sharing: The pull-apart design makes it fun and social, ideal for sharing with friends.
Tools and Preparation
Gathering the right tools makes the process smoother. Here’s what you’ll need to whip up this delightful Garlic Parmesan Pull-Apart Bread.
Essential Tools and Equipment
- Mixing bowl
- Baking sheet
- Aluminum foil
- Knife
Importance of Each Tool
- Mixing bowl: Essential for combining ingredients thoroughly; a larger bowl allows for easy mixing without spills.
- Baking sheet: Provides an even surface for baking your bread; ensures that it cooks uniformly.
- Aluminum foil: Helps retain moisture while baking; prevents the crust from getting too hard.
Ingredients
For the Bread
- 1 large artisan loaf
For the Garlic Butter Mixture
- 1/2 cup unsalted butter, melted
- 4 cloves garlic, minced
- 1 tablespoon fresh parsley, chopped
For the Cheese Filling
- 1 cup shredded mozzarella cheese
- 1/2 cup grated Parmesan cheese
How to Make Garlic Parmesan Pull-Apart Bread
Step 1: Preheat the Oven
Preheat your oven to 375°F (190°C). This ensures your bread bakes evenly and gets that perfect golden crust.
Step 2: Prepare the Garlic Butter Mixture
In a mixing bowl:
1. Combine melted butter, minced garlic, and chopped parsley.
2. Mix well until all ingredients are fully blended.
Step 3: Cut the Bread
Using a sharp knife:
1. Carefully cut diagonal slits into the artisan loaf without cutting all the way through.
2. Make sure slits cross each other to create small squares that will hold the filling.
Step 4: Fill with Cheese and Garlic Butter
- Gently pry open each slit in the bread.
- Brush generous amounts of the garlic butter mixture into each slit.
- Stuff shredded mozzarella cheese and grated Parmesan cheese into every opening.
Step 5: Wrap and Bake
- Wrap the filled loaf in aluminum foil.
- Place it on a baking sheet and bake for about 15-20 minutes until heated through.
Step 6: Serve Hot
Remove from oven, unwrap carefully, and serve warm. Enjoy pulling apart this cheesy delight!
How to Serve Garlic Parmesan Pull-Apart Bread
Garlic Parmesan Pull-Apart Bread is a versatile dish that can be served in various ways depending on the occasion. Whether you’re hosting a party or enjoying a cozy night in, here are some serving suggestions to make the most of this delicious treat.
As an Appetizer
- Perfect for Sharing: Cut the bread into pull-apart sections and serve on a platter. Guests can easily grab their pieces, making it ideal for gatherings.
- Dipping Sauces: Pair with marinara sauce, garlic butter, or a spicy aioli for an extra flavor boost.
With Soups
- Hearty Compliment: Serve alongside a warm bowl of tomato basil soup or creamy potato leek soup. The bread soaks up the flavors beautifully.
- Salads on the Side: A refreshing garden salad complements the richness of the pull-apart bread perfectly.
As a Snack
- Perfect Movie Companion: Enjoy it as a snack while watching your favorite film. It’s a comforting choice that everyone will love.
- Lunchbox Treat: Pack some pieces for a tasty lunch option. It pairs well with fresh fruit or crunchy veggies.
How to Perfect Garlic Parmesan Pull-Apart Bread
For the best results when making Garlic Parmesan Pull-Apart Bread, keep these tips in mind:
- Use Fresh Ingredients: Fresh garlic and high-quality cheese enhance the flavor significantly.
- Don’t Skimp on Butter: Generous amounts of melted butter ensure every piece is rich and flavorful.
- Let it Rise Properly: Allowing the dough enough time to rise helps achieve that light and airy texture.
- Bake at the Right Temperature: Ensure your oven is preheated properly before baking for even cooking.
- Keep It Covered: Covering the bread with foil during baking prevents over-browning while ensuring it’s cooked through.
Best Side Dishes for Garlic Parmesan Pull-Apart Bread
Garlic Parmesan Pull-Apart Bread pairs wonderfully with various side dishes. Here are some great options to consider:
- Mixed Green Salad: A light salad with vinaigrette balances out the richness of the bread.
- Roasted Vegetables: Colorful roasted veggies add nutrition and vibrant flavors to your meal.
- Creamy Tomato Soup: This classic pairing enhances comfort food vibes and is perfect for dipping.
- Grilled Chicken Salad: A protein-packed option that complements the bread’s flavors while adding heartiness.
- Pasta Primavera: Light pasta dishes featuring seasonal vegetables pair beautifully with this cheesy delight.
- Coleslaw: A tangy coleslaw provides crunch and freshness, contrasting nicely with the soft bread.
Common Mistakes to Avoid
To ensure your Garlic Parmesan Pull-Apart Bread turns out perfectly, avoid these common mistakes.
- Using stale bread: Fresh bread is key for pull-apart texture. Opt for a crusty loaf that’s just a day or two old.
- Overloading with garlic: While garlic adds flavor, too much can overpower the dish. Stick to the recommended amount for a balanced taste.
- Skimping on cheese: Cheese is essential for that gooey pull-apart experience. Don’t be shy; use generous amounts of mozzarella and Parmesan.
- Not letting it cool properly: Cutting into the bread while it’s too hot can make it fall apart. Allow it to cool for a few minutes before serving.
- Ignoring seasoning: A pinch of salt and pepper enhances flavors significantly. Don’t forget to season your butter and garlic mixture.
Storage & Reheating Instructions
Refrigerator Storage
- Store in an airtight container to keep moisture in.
- Consume within 3 days for optimal freshness.
Freezing Garlic Parmesan Pull-Apart Bread
- Wrap tightly in plastic wrap, then place in a freezer-safe bag.
- Good for up to 2 months; label with the date to track freshness.
Reheating Garlic Parmesan Pull-Apart Bread
- Oven: Preheat to 350°F (175°C). Wrap in foil and heat for about 15-20 minutes until warm.
- Microwave: Heat in short intervals (15-20 seconds) until warm but not soggy.
- Stovetop: Place a slice in a skillet over low heat, cover, and cook until warm.
Frequently Asked Questions
What makes Garlic Parmesan Pull-Apart Bread so special?
Garlic Parmesan Pull-Apart Bread is loved for its combination of crispy crust and soft, cheesy interior. The garlic and cheese blend creates an irresistible flavor profile perfect for any occasion.
Can I customize my Garlic Parmesan Pull-Apart Bread?
Absolutely! You can add herbs like parsley or basil, or even incorporate other cheeses such as cheddar or gouda for different flavors.
How do I serve Garlic Parmesan Pull-Apart Bread?
This dish is great as an appetizer or side. Serve it warm with marinara sauce or your favorite dipping sauce to enhance the experience.
How long does Garlic Parmesan Pull-Apart Bread last?
When stored properly in the refrigerator, this bread lasts about 3 days, while frozen bread can stay fresh for up to 2 months.
Final Thoughts
Garlic Parmesan Pull-Apart Bread is an easy-to-make treat that brings joy to any gathering. Its versatility allows you to experiment with various flavors and ingredients, making it a recipe worth trying. Whether you’re hosting friends or enjoying a cozy night in, this pull-apart bread will surely impress!
Garlic Parmesan Pull-Apart Bread
Indulge in the irresistible Garlic Parmesan Pull-Apart Bread—a cheesy, gooey delight perfect for any gathering or cozy night in. This recipe features a crusty artisan loaf generously filled with savory garlic butter, melted mozzarella, and rich Parmesan cheese. Each pull-apart piece offers a warm, flavorful bite that’s sure to impress your family and friends. Easy to make and endlessly customizable, this dish is not only a crowd-pleaser but also an entertaining way to enjoy bread at your next event. Get ready to savor every cheesy morsel!
- Prep Time: 15 minutes
- Cook Time: 20 minutes
- Total Time: 35 minutes
- Yield: Approximately 12 servings 1x
- Category: Appetizer
- Method: Baking
- Cuisine: American
Ingredients
- 1 large artisan loaf
- 1/2 cup unsalted butter, melted
- 4 cloves garlic, minced
- 1 tablespoon fresh parsley, chopped
- 1 cup shredded mozzarella cheese
- 1/2 cup grated Parmesan cheese
Instructions
- Preheat your oven to 375°F (190°C).
- In a mixing bowl, combine melted butter, minced garlic, and chopped parsley until well blended.
- Carefully cut diagonal slits into the artisan loaf without cutting all the way through to create small squares.
- Gently pry open each slit and brush the garlic butter mixture generously inside. Stuff with shredded mozzarella and grated Parmesan cheese.
- Wrap the filled loaf in aluminum foil and place it on a baking sheet. Bake for 15-20 minutes or until heated through.
- Remove from the oven, unwrap carefully, and serve warm.
Nutrition
- Serving Size: 1 slice (50g)
- Calories: 210
- Sugar: 0g
- Sodium: 300mg
- Fat: 14g
- Saturated Fat: 9g
- Unsaturated Fat: 4g
- Trans Fat: 0g
- Carbohydrates: 18g
- Fiber: 1g
- Protein: 5g
- Cholesterol: 35mg